Blog and News > support > Retain Customers Using CANDDi
Retain Customers Using CANDDi
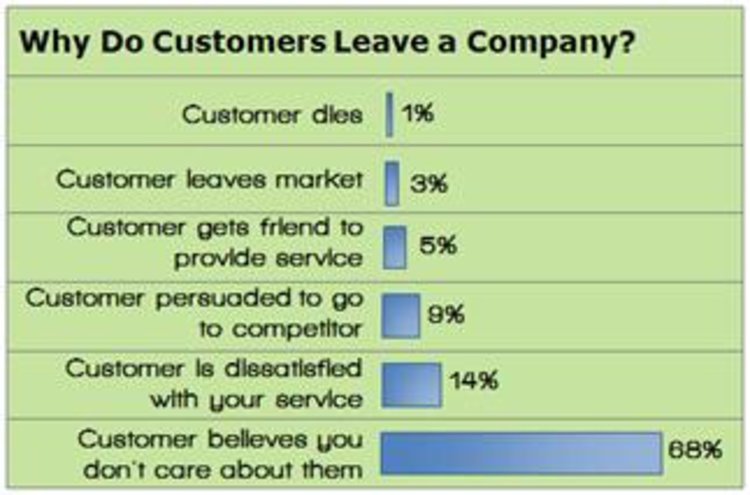
It is a fact that companies with high retention rates grow faster and there are opportunities for all of us to make the most of the customer base we have on board.

Summary
Customers that are supported remain loyal and motivated to resist competition. Studies have revealed that the cost of keeping an existing customer is less that 10% of the cost of finding new ones.
Below is an example of how CANDDi can be used as a real-time retention/ support platform. This article goes through the steps of setting up a customer stream with regards to ongoing support.

My Aim: I want to ensure that my existing customers are receiving the support they need whilst using my product. I want to make sure that the FAQ page is providing the right answers for them or if there is further assistance that is needed.
- Understand how registered users are engaging with your site
- Implement Tags
- Build Streams
- Set-up Triggers
- Reach Out
How to:
Step 1. Define The Stages
Define the stages within your retention funnel which you wish to track. Typically these will look like:
- Has logged in
- Has set-up system
- Has done action X, Y, Z
- Has responded to latest training email / customer news letter
Example: My retention stage would be ‘Has visited the customer visited the FAQ page.’
Step 2: Identify How You Know:
Identify how you “know” that a Contact has performed the task required in each step. Sometimes this will be easy (for example - a Contact has logged in if they have submitted the login form). Sometimes this will be much trickier - for example you might define a “Customer” as someone who has paid their last bill (whether this be by recurring subscription / BACS / etc…). This information might only be known in your billing platform.
Example: I “know” my customer is looking for an answer as they have visited the FAQ page.
NB: Exclude Your Company: It goes without saying that you’re less interested by the behaviour of people from your own company. You can do this using the Excludes settings. CANDDi will still track people from your organisation however they won’t appear in any of your custom streams (they will only appear in the excluded stream).
Step 3: Tag Up Your Site
Using the events defined in Steps 1 & 2 - the next step is to use CANDDi to tag up your site so that when Contacts complete appropriate actions then these will be stored as tags against their CANDDi profile. What’s A Tag?
You will be able to assign a tag using the CANDDi Tag Dashboard. Find the ‘How To’ here
Example: My customer has visited the FAQ page and clicked on a question. A tag is assigned to this customer called ‘FAQ’.

Step 4: Creating Relevant Streams
Now comes the fun part. You can build a stream (or streams) based on one or more of these tags. A stream will filter all the customers that have visited this section of the website. Create A Stream.

Step 5: Add A Trigger
So you are notified every time a customer is added to this list, you can add a trigger. This can be set up and sent to you as a notification email. Add Trigger.

Step 6: Reach Out
This whole process is to ensure that companies are able to following their existing customer’s behaviour. In the example I have given, I am following the support we offer as a business and going above and beyond to ensure that customer is receiving the right questions.
After receiving the trigger that my customer has clicked on a FAQ page, I can follow up with a call or email and ensure that they were satisfied with the answer or whether they are still asking questions. By preempting the customer query and approaching them first, the customer feels looked after and there is no cause for a complaint.
We hope this provides you with another use for CANDDi in your business without the hassle. For more information, live chat us now for a free demo
Alice Flook
@flook88
CANDDi
Who, what, when, now.